If you’ve purchased the myTankLinker Automatic Edition, congratulations on choosing a smart solution for overhead water tank automation!
This guide will walk you through the step-by-step installation process, including sensor wiring, pump connection, LED indicators, and essential safety instructions — so you can get started with confidence.
इस पोस्ट में आप जानेंगे:
- myTankLinker Auto Edition डिवाइस को कैसे इंस्टॉल करें
- Sensor wiring और pump connection कैसे करें
- LED Indicators का क्या मतलब है
- और आखिर में Safety Tips
👇 नीचे दिए गए स्टेप्स को ध्यान से पढ़ें और अपने डिवाइस को आसानी से इंस्टॉल करें।


📦 What’s in the Box?
- 1x myTankLinker Auto Edition Unit
- 1x User Manual
🔧 Tools You’ll Need
- Drill Machine
- Screwdriver
- Electric Tape
- AC Wire (for power) and Plug
- Copper Coated Wires (for tank sensors)
📋 Installation Steps:
📌 Step 1: Mount the Device (means मतलब डिवाइस को कहां लगाएं?।)
myTankLinker Auto Edition डिवाइस को पंप के पास, किसी indoor या weather-protected area में लगाएं।
डिवाइस के टॉप और बॉटम में mounting holes हैं, जिनसे आप इसे दीवार पर screws की मदद से माउंट कर सकते हैं।
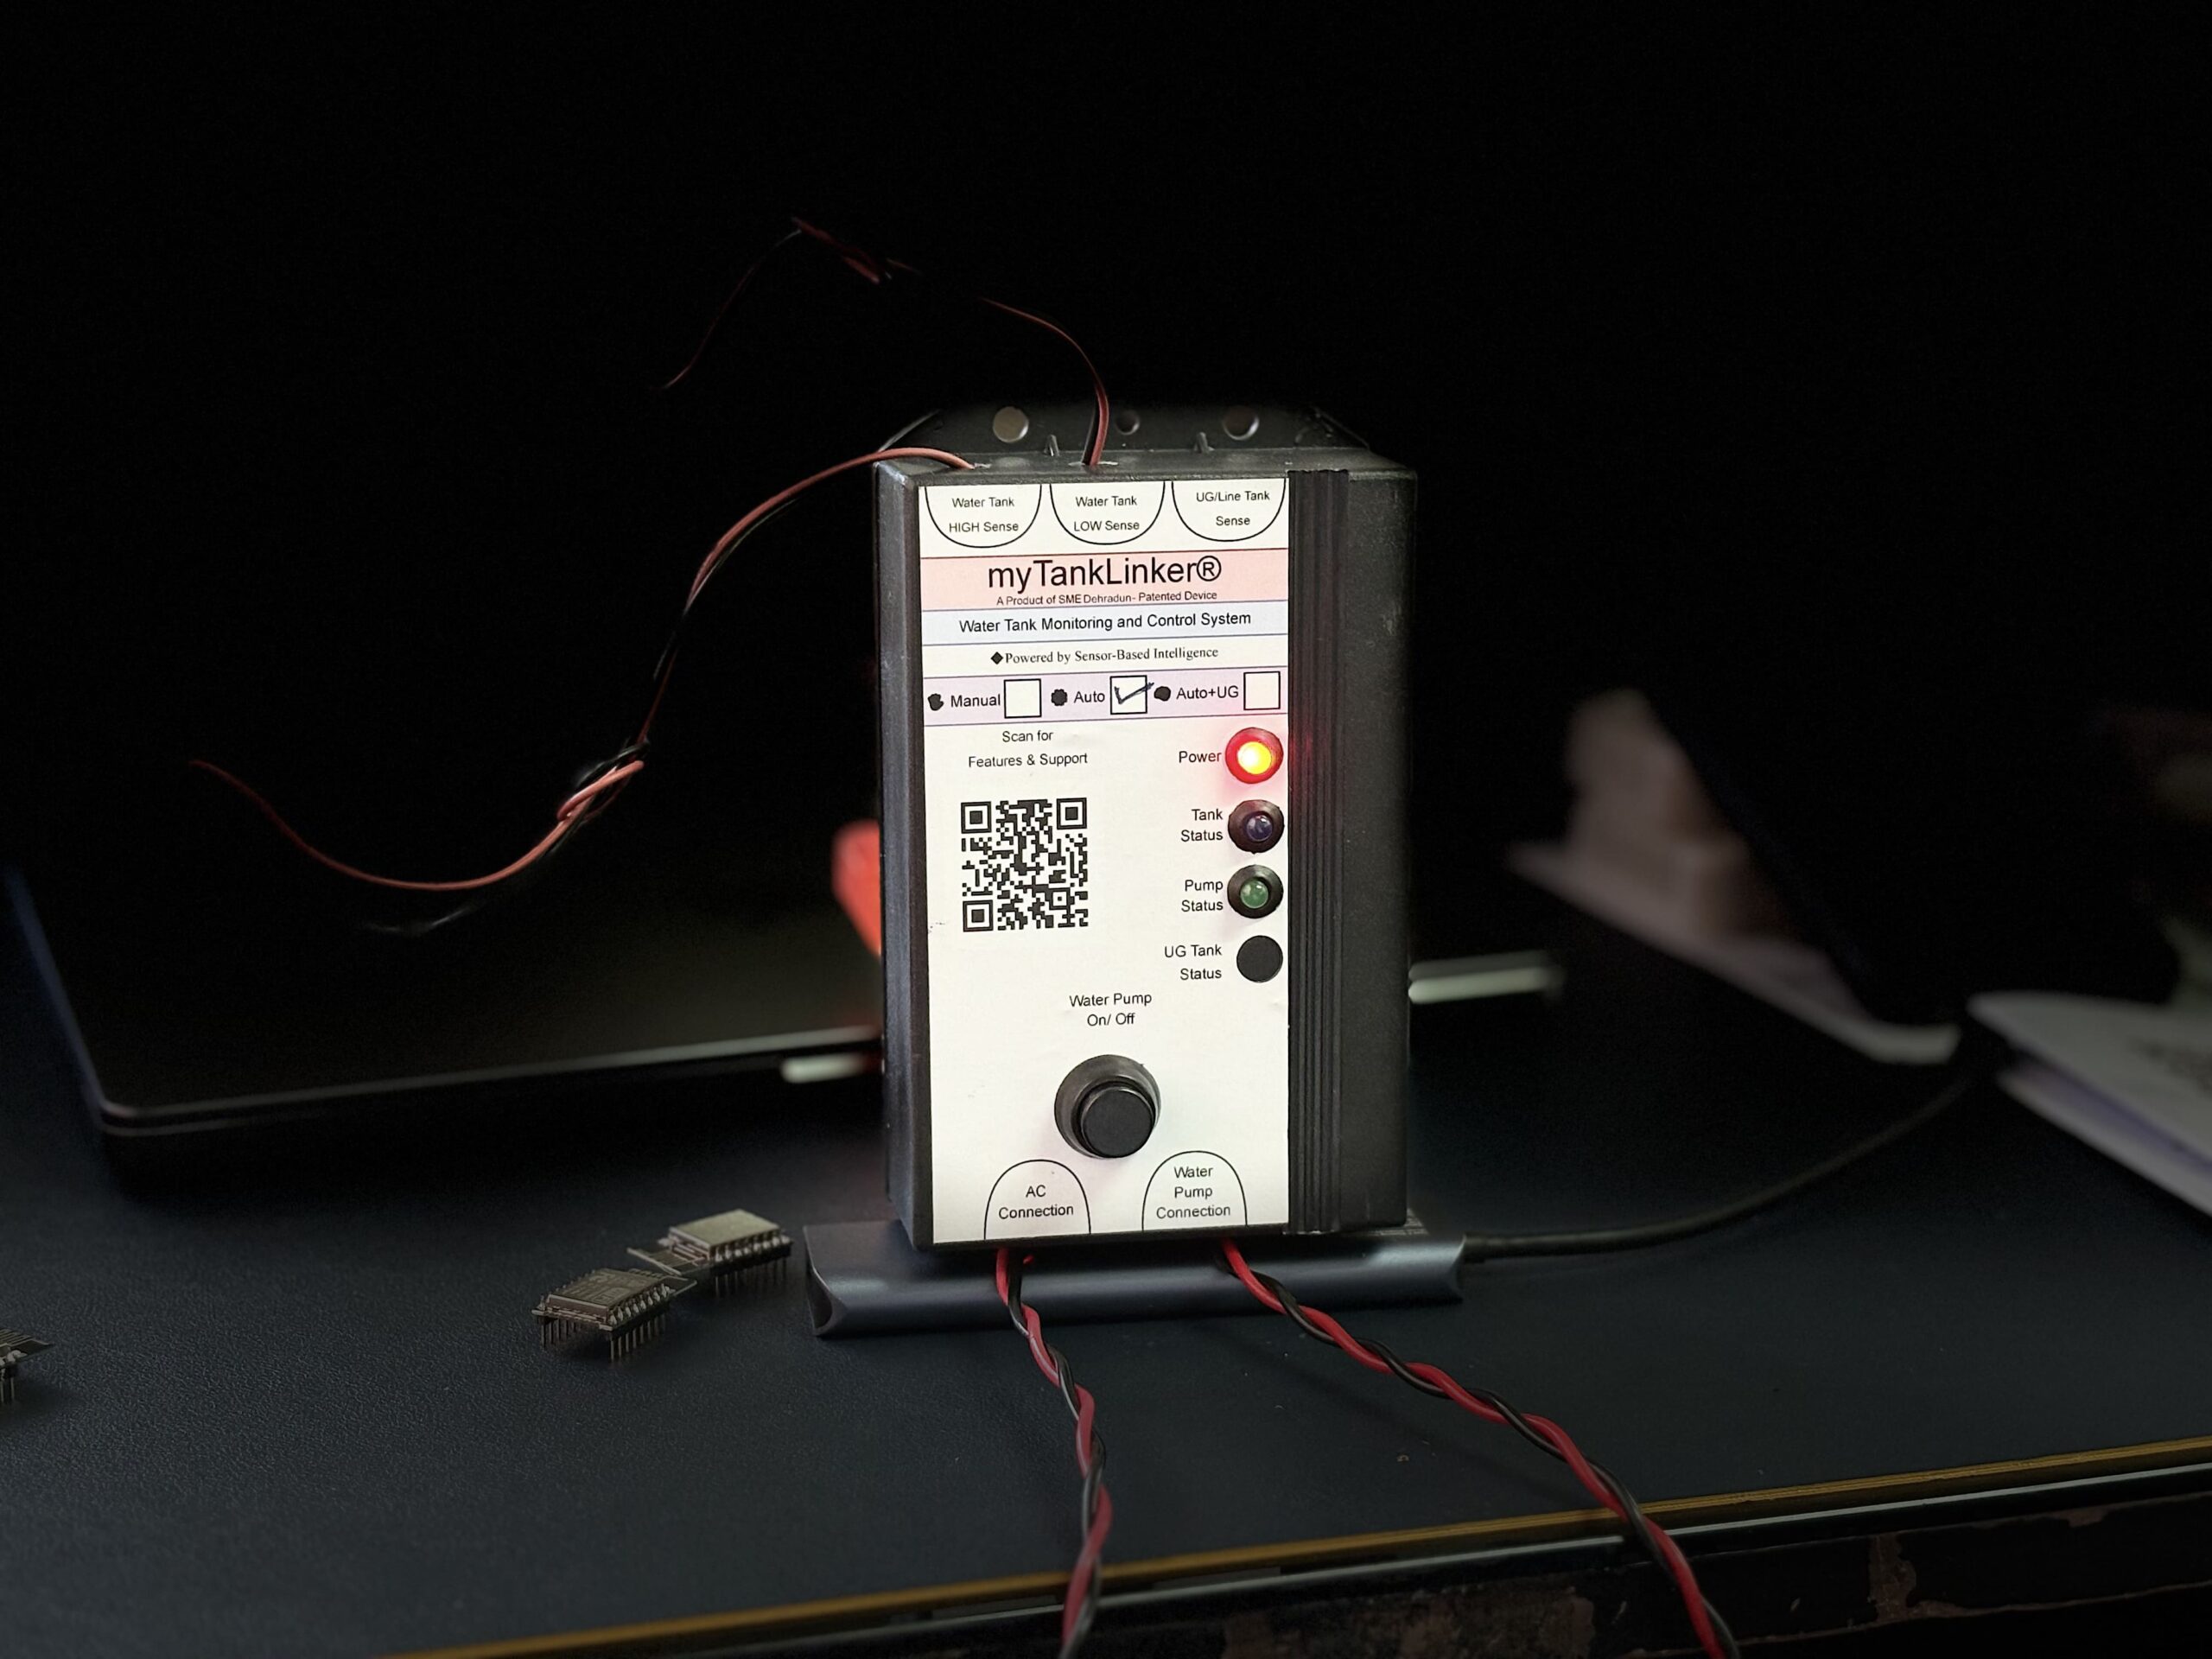
इस डिवाइस में 3 सेंसिंग टर्मिनल दिए गए हैं:
Water Tank HIGH Sense
Water Tank LOW Sense
UG/Line Tank Sense
📌 लेकिन ध्यान दें: इस वर्जन (Auto Edition) में सिर्फ HIGH और LOW Sense terminals का इस्तेमाल होता है।
UG/Line Tank Sense इस वर्जन में उपयोग नहीं होता है।
👇 सेंसर को इस तरह से कनेक्ट करें:
1️⃣ Water Tank HIGH Sense
इस टर्मिनल से वायर लेकर उसे टंकी के ऊपरी लेवल तक डालें — ताकि जब पानी ऊपर तक पहुंचे, डिवाइस पंप को OFF कर सके।
2️⃣ Water Tank LOW Sense
LOW Sense टर्मिनल से वायर लेकर उसे टंकी के बिलकुल निचले स्तर तक डालें — ताकि जब पानी कम हो जाए, डिवाइस पंप को ON कर सके।
⚠️ UG/Line Tank Sense इस वर्जन में उपयोग नहीं होता है।
⚠️ सभी वायरों को जोड़ने के बाद उन्हें अच्छे से electric tape से इंसुलेट करें — ताकि कोई तार आपस में टच न हो।

🧠 Step 3: Water Pump कनेक्शन कैसे करें?
डिवाइस के नीचे दिए गए “Water Pump Connection” टर्मिनल में पंप की LIVE और NEUTRAL वायर को कनेक्ट करें।
इसे अच्छी तरह से इंसुलेटेड टेप से सुरक्षित करें।
Step 4: Power Supply कनेक्शन कैसे करें।
डिवाइस के नीचे “AC Connection” टर्मिनल दिया गया है।
इसे आप अपने AC socket या main line से कनेक्ट करें।
⚠️ कनेक्शन से पहले main switch OFF रखें।
💡 Step 5: LED Indicators को समझें, कैसे काम करता है।
🔴 Power LED (Red) – डिवाइस ON होने पर Glow होती है।
🟢 Tank Status LED (Green) – टंकी Full होने पर Glow होती है।
🔵 Pump Status LED (Blue) – पंप चालू होने पर Glow होती है।
🟡 UG Tank LED (Yellow) – ❌ इस वर्जन में उपयोग नहीं होता है।
🌟 Special Features – Why myTankLinker Auto Edition is Smarter
✅ Fully Automatic Pump Control: No more manual effort! The pump automatically turns ON when the overhead tank is low, and OFF when it’s full — giving you complete peace of mind.
🧠 Advanced Sensor-Based Technology: Say goodbye to rusty float switches and inaccurate probes! Uses non-contact, corrosion-resistant sensors with zero maintenance.
🧪 False Signal Rejection: Built-in logic filters out splashing, bubbles, or foam, ensuring only accurate water level sensing.
📡 Up to 100 Feet Sensor Range: Perfect for multi-storey buildings — handles tall tanks and long wiring with reliable accuracy.
🔆 LED Status Display: Instantly know what’s happening! Power ON, Pump Running, and Tank Full — all clearly shown with bright LED indicators.
🧠 EEPROM Memory: Power failure? No problem! The system remembers the last pump state and resumes exactly where it left off.
⚠️ Conflict Detection & Failsafe Mode: In case of sensor fault or wiring error, the system shuts down automatically to protect your pump and avoid accidental overflow or dry-run.
🔁 Manual Override (With Safety Logic): Need to control the pump manually? Use the built-in switch — it works only when conditions are safe, preventing misuse.
🔄 One-Touch Reset Function: Long-press to reset the system and clear saved memory — ideal during reinstallation or maintenance.
⚡ Low Power Consumption: Runs efficiently on 5V logic control, with internal power isolation — safe and energy-efficient.
🧱 Rugged & Compact Design: Built with durable materials, compact enough for tight spaces, and ready for long-term use in Indian weather conditions.
🔧 DIY-Friendly Installation: No complex setup — most users install it themselves without an electrician.
🛡️ Warranty
6 Months Warranty
(Fire और Water damage शामिल नहीं)
📄 Installation Manual (PDF):
📢 Safety Instructions (जरूर पढ़ें):
⚠️ डिवाइस को गीले हाथों से न छुएं
⚠️ वायरिंग से पहले हमेशा पावर OFF करें
⚠️ डिवाइस को सीधी धूप से बचाकर लगाएं
⚠️ इंसुलेटेड चप्पल या शूज़ पहनकर काम करें